

How to Build a Gatsby Source Plugin, using Hashnode as an example
In this article, we'll walk through a tutorial showing how to build a source plugin for Hashnode posts in a Gatsby application.


Gatsby is a React framework also called a Static Site Generation tool which can be used to create static pages from dynamic data. This data can be gotten from any source.
In this article, we'll walk through a tutorial showing how to build a source plugin for Hashnode posts.
The function of the plugin is to pull the posts of a user from Hashnode using the Hashnode API (a GraphQL-supported API) and create GraphQL nodes from them. These nodes can then be queried with GraphQL within our application.
Note that, there's already a plugin called gatsby-source-hashnode in the NPM library. The end product of this tutorial may function the same way, but this article aims to show you how to build such plugins. You can apply this knowledge to any other content-based platform.
To have a better understanding of this article, a fair knowledge of Gatsby is required, especially working with GraphQL within Gatsby.
Setting up the project
We need to have a Gatsby project we can test the plugin on as we build it. If you have one already, you can jump to the next section.
To create a new project:
- install the
gatsbycli tool globally usingnpm i -g gatsby-cliso we can use it locally - install the gatsby-starter-default template using
gatsby new web-app https://github.com/gatsbyjs/gatsby-starter-defaulton your terminal
web-app is the project's folder's name, so you can use something else if you want.
Creating the plugin
To use a plugin, you'll have to download it from a package manager (like NPM). And before you download it, it has to be published. Since we're building it and testing alongside, publishing updated versions and downloading them continuously can be a strenuous process during development.
Fortunately, Gatsby allows us to create local plugins which live within our project. This way, it would be easier to test as we build.
Two things to note:
- Plugins are only used by Gatsby when your pages are generated (during
gatsby developandgatsby buildprocess). Plugins do not run when your page has been built. This means if you make any change to your plugin while your pages have been built, you would have to restart the server to see the new changes - One caveat with plugins is that Gatsby caches them. This means, for subsequent changes to our plugin's implementation, you may have to clear the cache and re-start the server to see the changes reflected.
Create source plugin folder
Next, create a folder called plugins at the root directory. This is where local plugins live. Inside the folder, create a folder, which you can call gatsby-source-hashnode.
Gatsby has a naming convention for plugins which influences the name we're giving to ours.
Export plugin
The most important file in this plugin is gatsby-node.js which will export a named function called sourceNodes. Gatsby will invoke this function during the build process.
Add the gatsby-node.js file in your project folder (gatsby-source-hashnode) and add the following codes:
exports.sourceNodes = (obj1, obj2) => {}
While invoking the sourceNodes function, Gatsby passes some arguments. The first and second arguments are objects. We'll look at the second argument later in the article.
We're only interested in three items from the first argument which are:
actions: an object containing several methods from Gatsby. For our plugin, we're only interested in thecreateNodemethod which we'll use to create the GraphQL nodes for the Hashnode posts. We'll use these nodes for our GraphQL queriescreateNodeId: a method used to generate a unique id for every node created fromcreateNodecreateContentDigest: a method used to create a checksum digest from data. Gatsby uses the checksum digest to identify data (from Gatsby APIs in our case) that has been changed.
The sourceNodes method will contain the implementation that fetches some Gatsby posts, and create nodes from them.
The implementation
First, let's play with the API a little. Head over to the Hashnode API Playground and enter the following query:
{
    user(username: "dillion") {
        publication {
            posts {
                _id
                title
                brief
                slug
                dateAdded
            }
        }
    }
}
You can use "dillion" (my name), yours, or any existing username on Hashnode.
Here's the result:
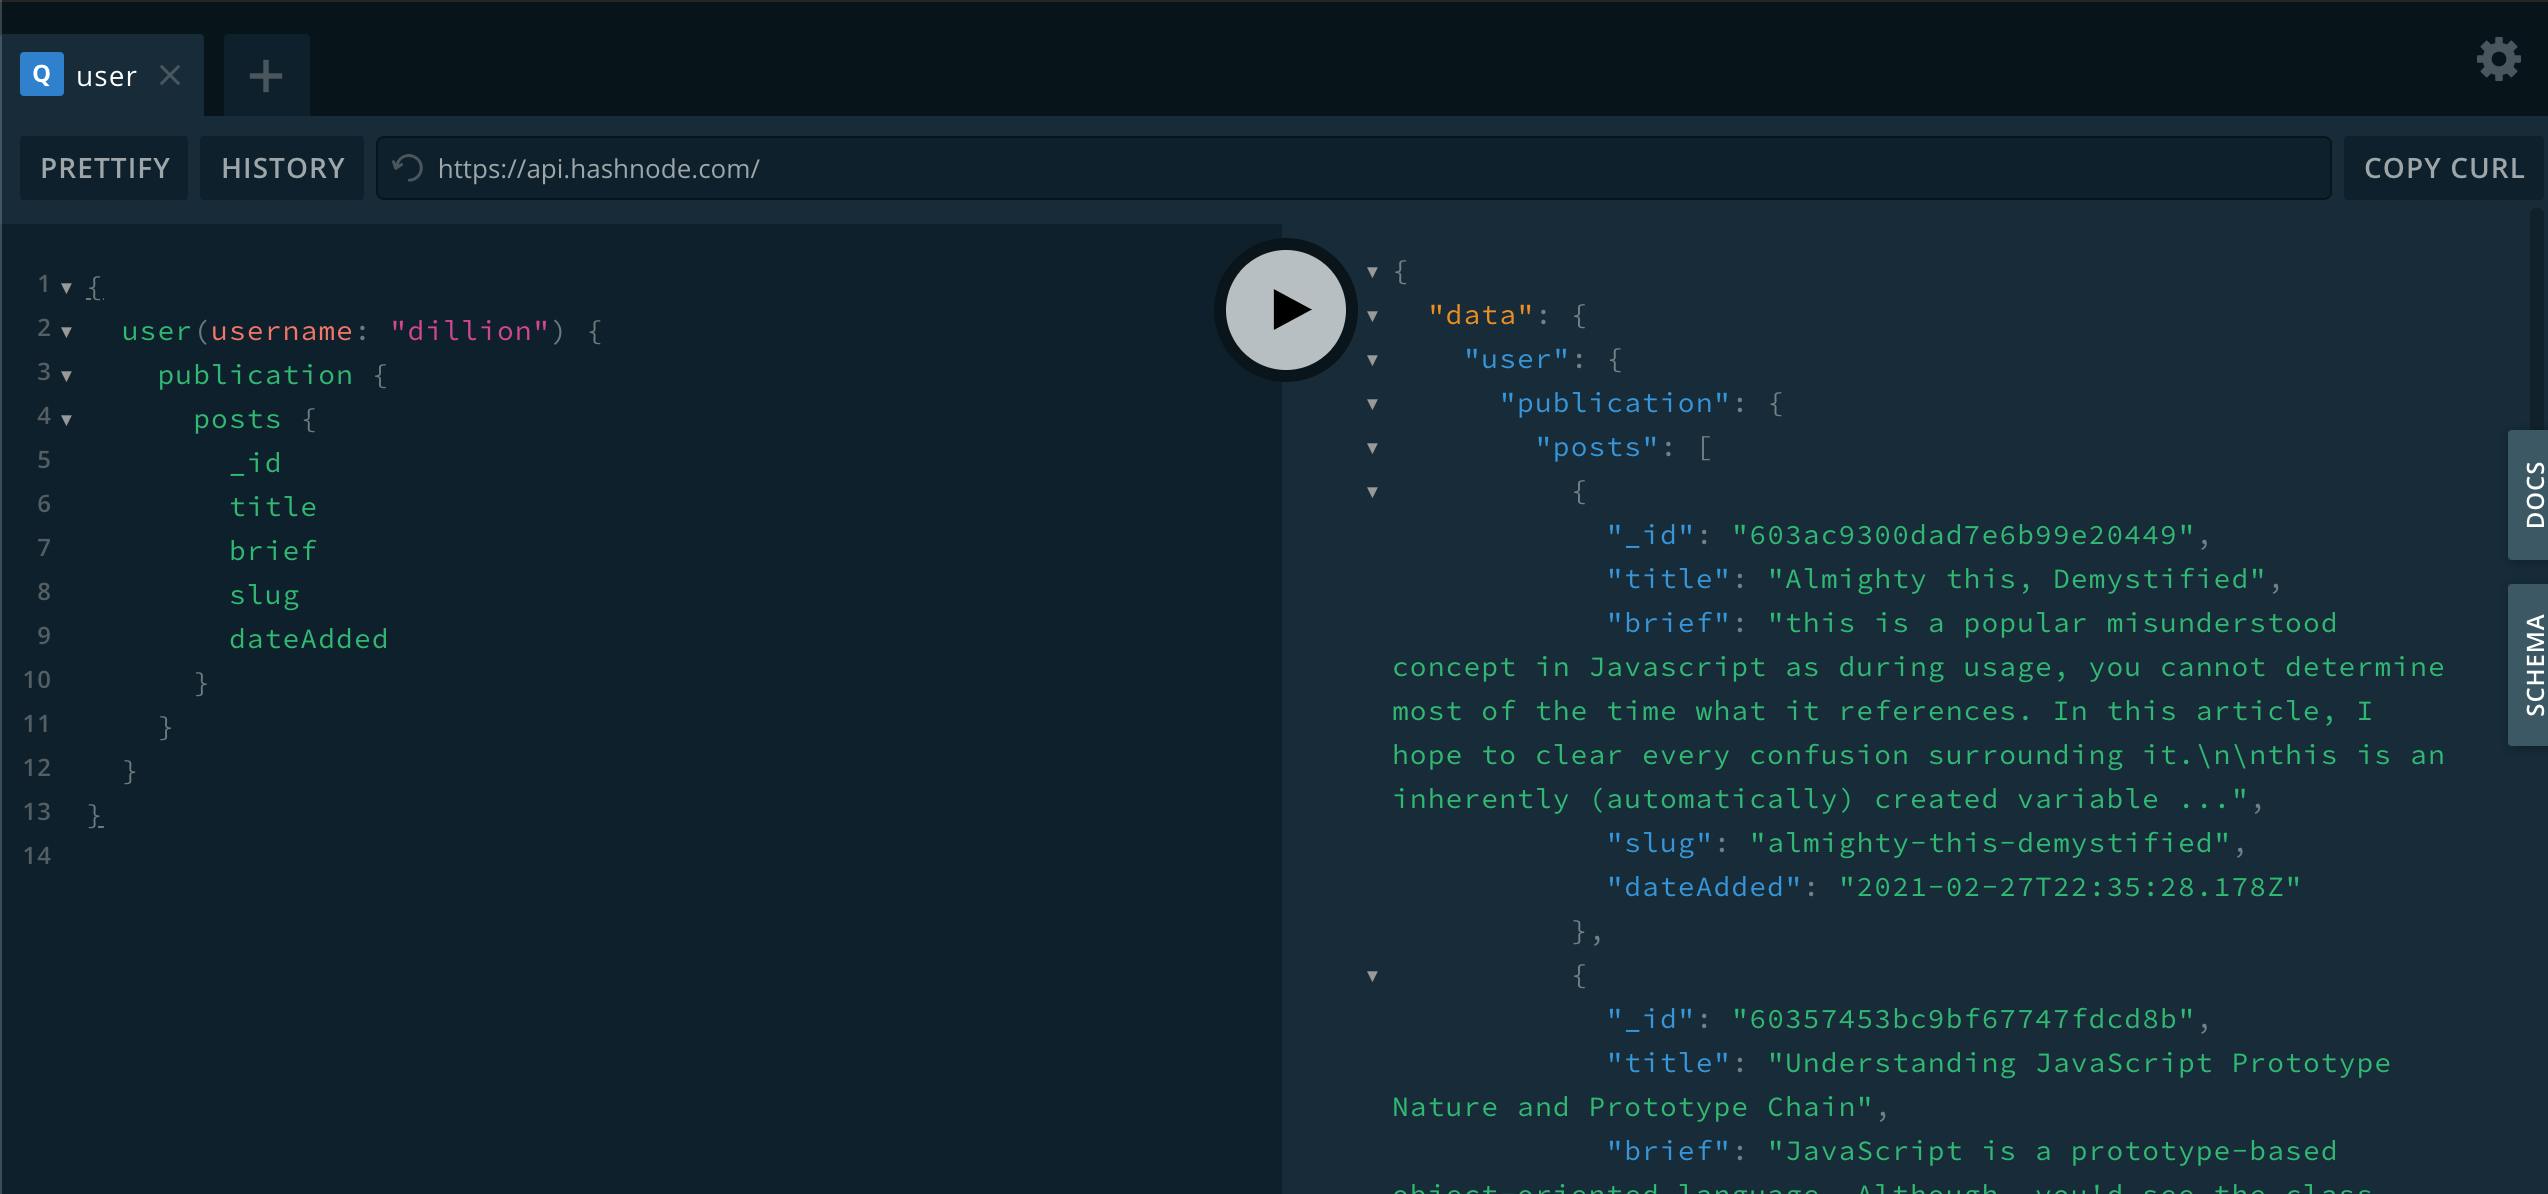
For this tutorial, we'll only use the _id, title, brief, slug, and dateAdded fields. You can fetch as many fields as the API provides if you want.
For our implementation, here are three things we need to do:
- fetch all posts of a user from the API
- loop through each post and create a node for it
- create a graphql query in the main project that fetches all posts and displays them on the UI.
The API supports graphql, hence, we cannot use fetch. We'd be using graphql-request, a library that supports GraphqlQL-based APIs.
In the gatsby-source-hashnode directory, run the following in the terminal:
npm init -y
npm i --save graphql-request
The first initializes the directory like a package, and the second command installs the graphql-request plugin. Now let's use it in our plugin. Update gatsby-node.js to this:
const { request, gql } = require("graphql-request")

exports.sourceNodes = async (obj1, obj2) => {
    const query = gql`
        query {
            user(username: "dillion") {
                publication {
                    posts {
                        _id
                        title
                        brief
                        slug
                        dateAdded
                    }
                }
            }
        }
    `

    const response = await request("https://api.hashnode.com/", query)
    console.log(response.user.publication.posts)
}
Note that this is an asynchronous function. If it's not defined as asynchronous, Gatsby will not wait for the function to resolve before moving further with the build process.
From our query, we expect the following structure for the result:
{
    user {
        publication {
            posts {
                ...
            }
        }
    }
}
Before moving further, we can confirm that the plugin works. Head over to gatsby-config.js in the root of web-app.
The config file looks like this:
module.exports = {
    siteMetadata: {
        title: `Gatsby Default Starter`,
        description: `Kick off your next, great Gatsby project with this default starter. This barebones starter ships with the main Gatsby configuration files you might need.`,
        author: `@gatsbyjs`,
    },
    plugins: [
        `gatsby-plugin-react-helmet`,
...
Add gatsby-source-hashnode in the plugins array like this:
    plugins: [
        `gatsby-source-hashnode`, // highlight-line
        `gatsby-plugin-react-helmet`
...
Now run gatsby develop to start the development server. On running this command, Gatsby executes all the plugins listed in the config file sequentially. For each plugin, it checks the plugins directory, and if it doesn't find it there, it checks node_modules. If it doesn't find it there also, it gives an error stating that the plugin does not exist.
If you've started the server, check the terminal when everything builds, and you'll find a result similar to:
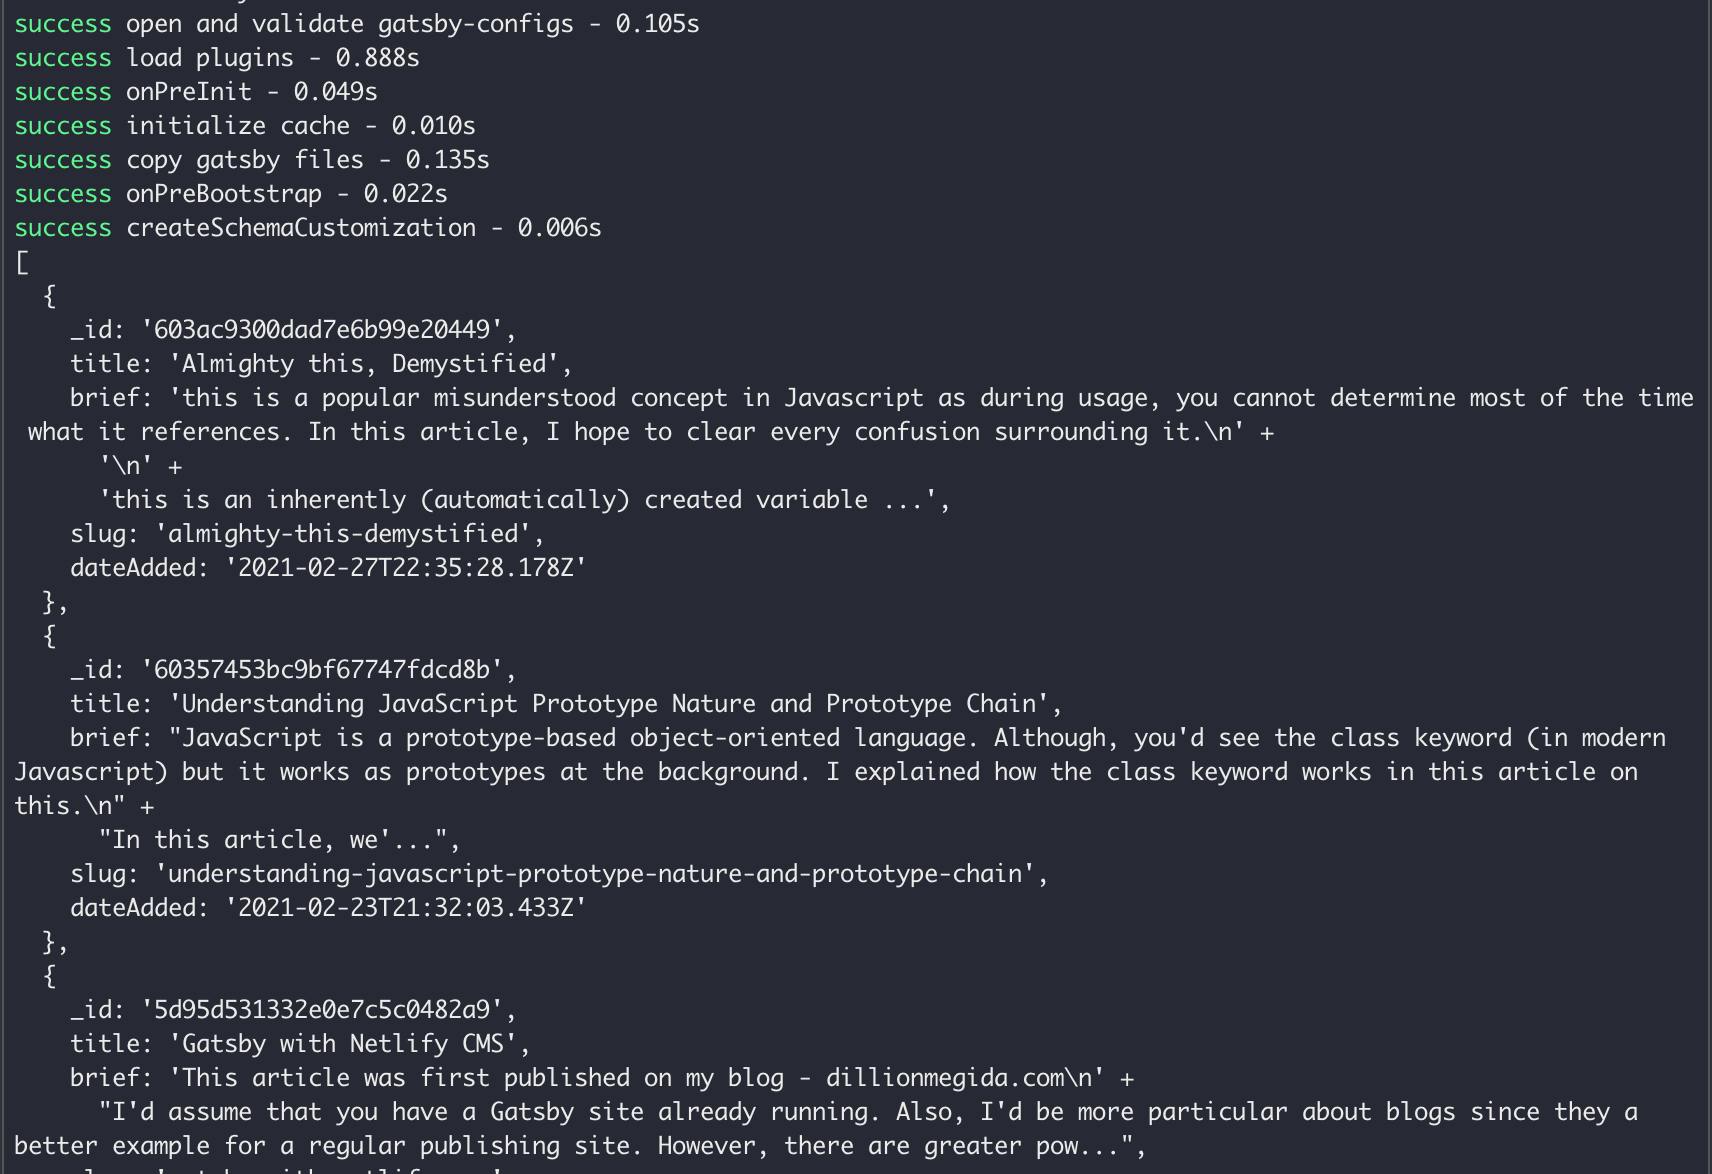
Now that we're getting the posts as expected, we can create our nodes from it. But before that, you'd notice that we're hardcoding the username. If we're making this plugin public, we need to allow the user to state their prefered username without editing the plugin.
Gatsby passes two arguments to sourceNodes as I stated earlier. The first one contains those methods provided by Gatsby, and the second contains variables passed into the plugin from gatsby-config.js.
To pass a variable, head back to gatsby-config.js where you added the plugin, and update it to this:
    plugins: [
        // highlight-start
        {
            resolve: 'gatsby-source-hashnode',
            options: {
                username: 'dillion'
            }
        }
        // highlight-end
        `gatsby-plugin-react-helmet`
...
Then, update the gatsby-node.js file in gatsby-source-hashnode to this:
const { request, gql } = require("graphql-request")

exports.sourceNodes = async (obj1, obj2) => {
    //highlight-line
    // highlight-start
    const { username } = obj2 // highlight-line

    const variables = {
        username,
    }

    // highlight-end

    // pass the variable into the query
    const query = gql`
        query($username: String!) {
            user(username: $username) {
                publication {
                    posts {
                        _id
                        title
                        brief
                        slug
                        dateAdded
                    }
                }
            }
        }
    `

    const response = await request(
        "https://api.hashnode.com/",
        query,
        variables // highlight-line
    )
    console.log(response.user.publication.posts)
}
You may have to clear the cache using gatsby clean to see the new changes in our plugin.
The output on the terminal will be exactly what we had before. But now, the username is not determined by the plugin but by the project using it.
Now let's create the nodes
Update the plugin's gatsby-node.js to this:
const { request, gql } = require("graphql-request")

exports.sourceNodes = async (obj1, obj2) => {
    const { actions, createNodeId, createContentDigest } = obj1 // highlight-line
    const { createNode } = actions // highlight-line
    const { username } = obj2

    const variables = {
        username,
    }

    // pass the variable into the query
    const query = gql`
        query($username: String!) {
            user(username: $username) {
                publication {
                    posts {
                        _id
                        title
                        brief
                        slug
                        dateAdded
                    }
                }
            }
        }
    `

    const response = await request(
        "https://api.hashnode.com/",
        query,
        variables
    )

    // highlight-start
    const {
        user: {
            publication: { posts },
        },
    } = response

    for (let i = 0; i < posts.length; i++) {
        const post = posts[i]
        const node = {
            id: createNodeId(post._id),
            parent: null,
            children: [],
            internal: {
                type: `HashnodePost`,
                mediaType: `application/json`, // https://www.gatsbyjs.com/docs/reference/graphql-data-layer/node-interface/#mediatype
                content: JSON.stringify(post), // https://www.gatsbyjs.com/docs/reference/graphql-data-layer/node-interface/#content
                contentDigest: createContentDigest(post),
            },
            ...post,
        }
        createNode(node)
    }

    return

    // highlight-end
}
From the above, we get all the posts of the user and loop through them to create a node for each. We create a node object with:
- an
idproperty, assigned a unique id using thecreateNodeIdhelper function and passing the_idof the post gotten from Hashnode as an argument - a
parentproperty which is used to extend other nodes - a
childrenproperty which holds ids of child nodes - an
internalproperty that holds important fields for Gatsby. In it we have:type: the node type that this node belongs to. In our case, this belongs to theHashnodePosttypemediaType: exposes this node to transformer plugins for further processing. In our case, the object gotten from the API is more like JSON.content: holding the raw content which transformer plugins can also processcontentDigest: as stated above, for holding the checksum generated of the post object.
...post: spreads the post properties gotten from the API which according to our query includes_id,title,brief,sluganddateAdded
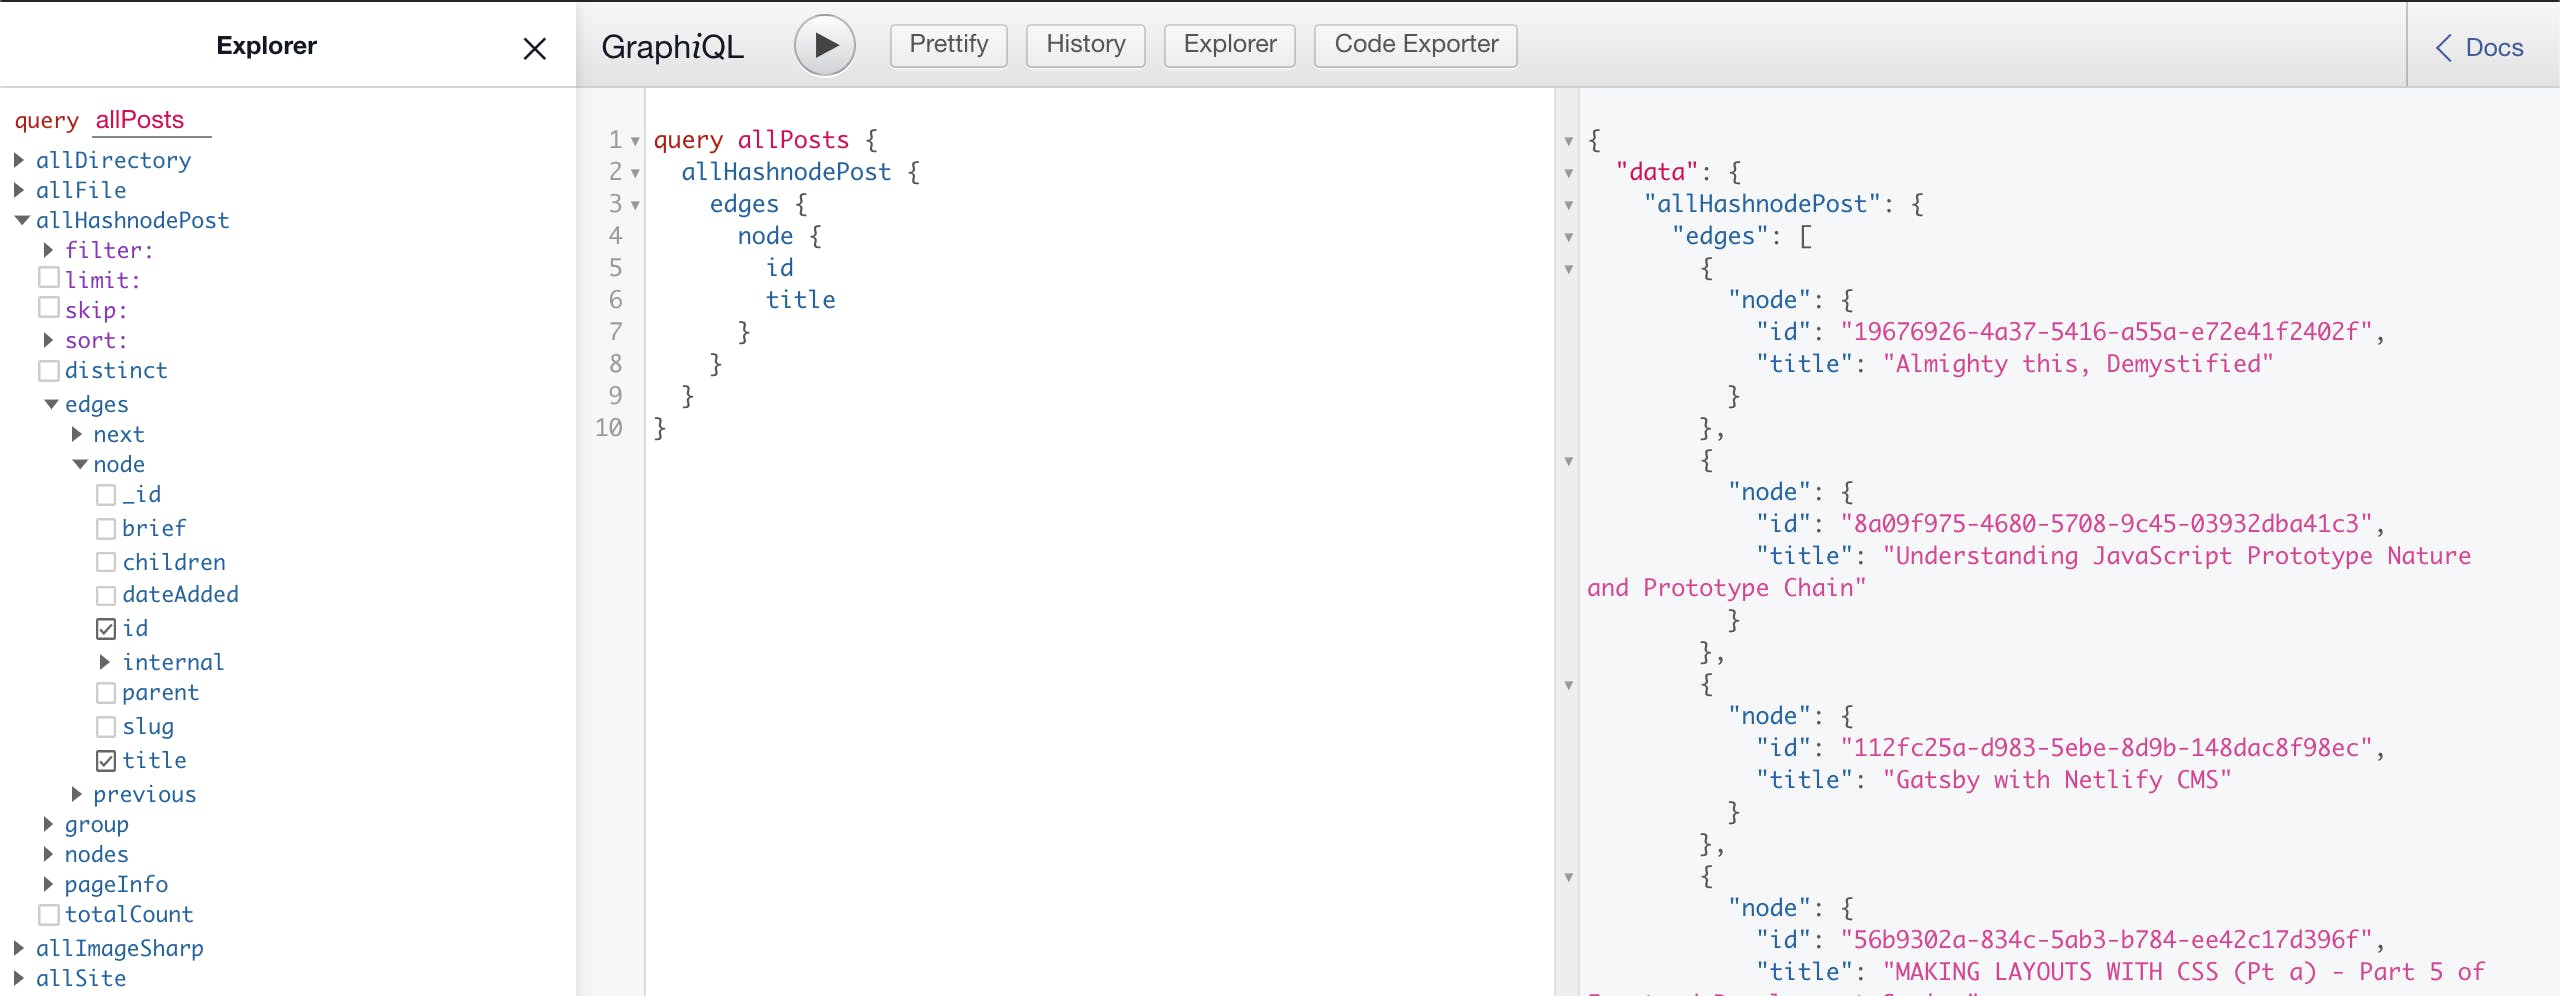
On every loop, we create the node using createNode. To see the nodes created, run gatsby develop and head over to localhost:8000/___graphql (three underscores) where we can query all our types.
Here's what you'll find on that page:
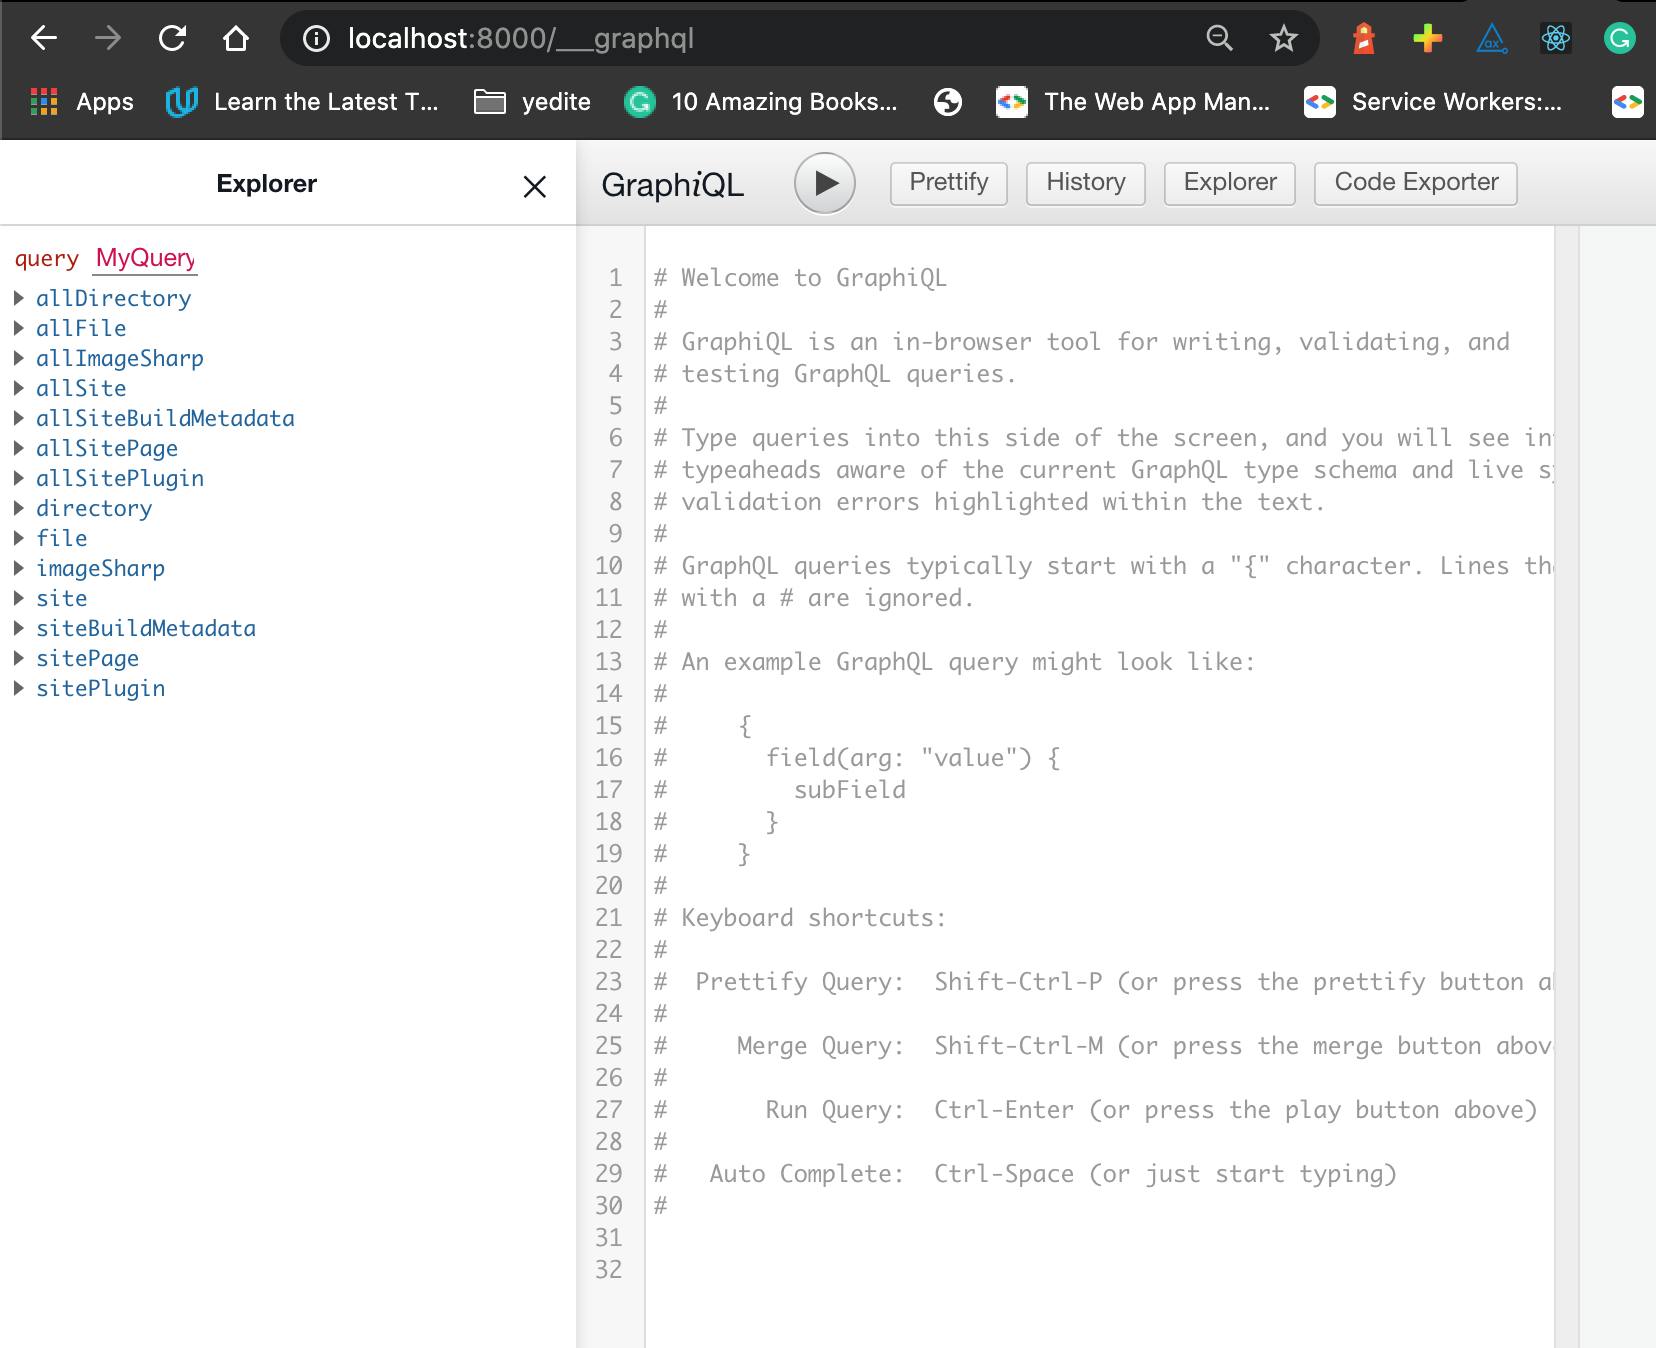
On the left, you'll find allHashnodePost and hashnodePost. The former is used to query all posts gotten from the API while the latter is used to query a single post. We can test this with the following query:
query {
    allHashnodePost {
        edges {
            node {
                id
                title
            }
        }
    }
}
Now, we can use our plugin in our project.
Head back to web-app, and update pages/index.js to the following:
import * as React from "react"
import { graphql } from "gatsby"

import Layout from "../components/layout"
import SEO from "../components/seo"

const IndexPage = ({ data }) => {
    const allPosts = data.allPosts.edges.map(({ node }) => node)

    return (
        <Layout>
            <SEO title="Home" />
            <h1>Hi people</h1>
            <p>Here are my Hashnode posts</p>
            {allPosts.map(p => (
                <div
                    style={{
                        marginBottom: "40px",
                        borderBottom: "1px solid black",
                        paddingBottom: "20px",
                    }}
                    key={p.id}
                >
                    <span>
                        Title:{" "}
                        <a href={`https://dillion.hashnode.dev/${p.slug}`}>
                            {p.title}
                        </a>
                    </span>
                    <br />
                    <br />
                    <span>
                        Date: <b>{p.dateAdded}</b>
                    </span>
                    <br />
                    <br />
                    <span>Brief: {p.brief}</span>
                </div>
            ))}
        </Layout>
    )
}

export default IndexPage

export const query = graphql`
    query {
        allPosts: allHashnodePost {
            edges {
                node {
                    id
                    title
                    dateAdded(formatString: "DD MMMM, YYYY")
                    brief
                    slug
                }
            }
        }
    }
`
On the homepage, we export a query that fetches all the posts of the user we've added to gatsby-config.js. The result is aliased with allPosts, and is inserted into the homepage component in a data object.
The posts are the nodes found in data.allPosts.edges, so we do a map to get only those nodes.
formatString is a date formatter provided automatically by Gatsby on date fields.
dillion.hashnode.dev is my hashnode domain where my blog posts are, so I can add the slug gotten from the API to make up the full URL for the post.
When you start your server, you'll find something similar to this on the homepage:
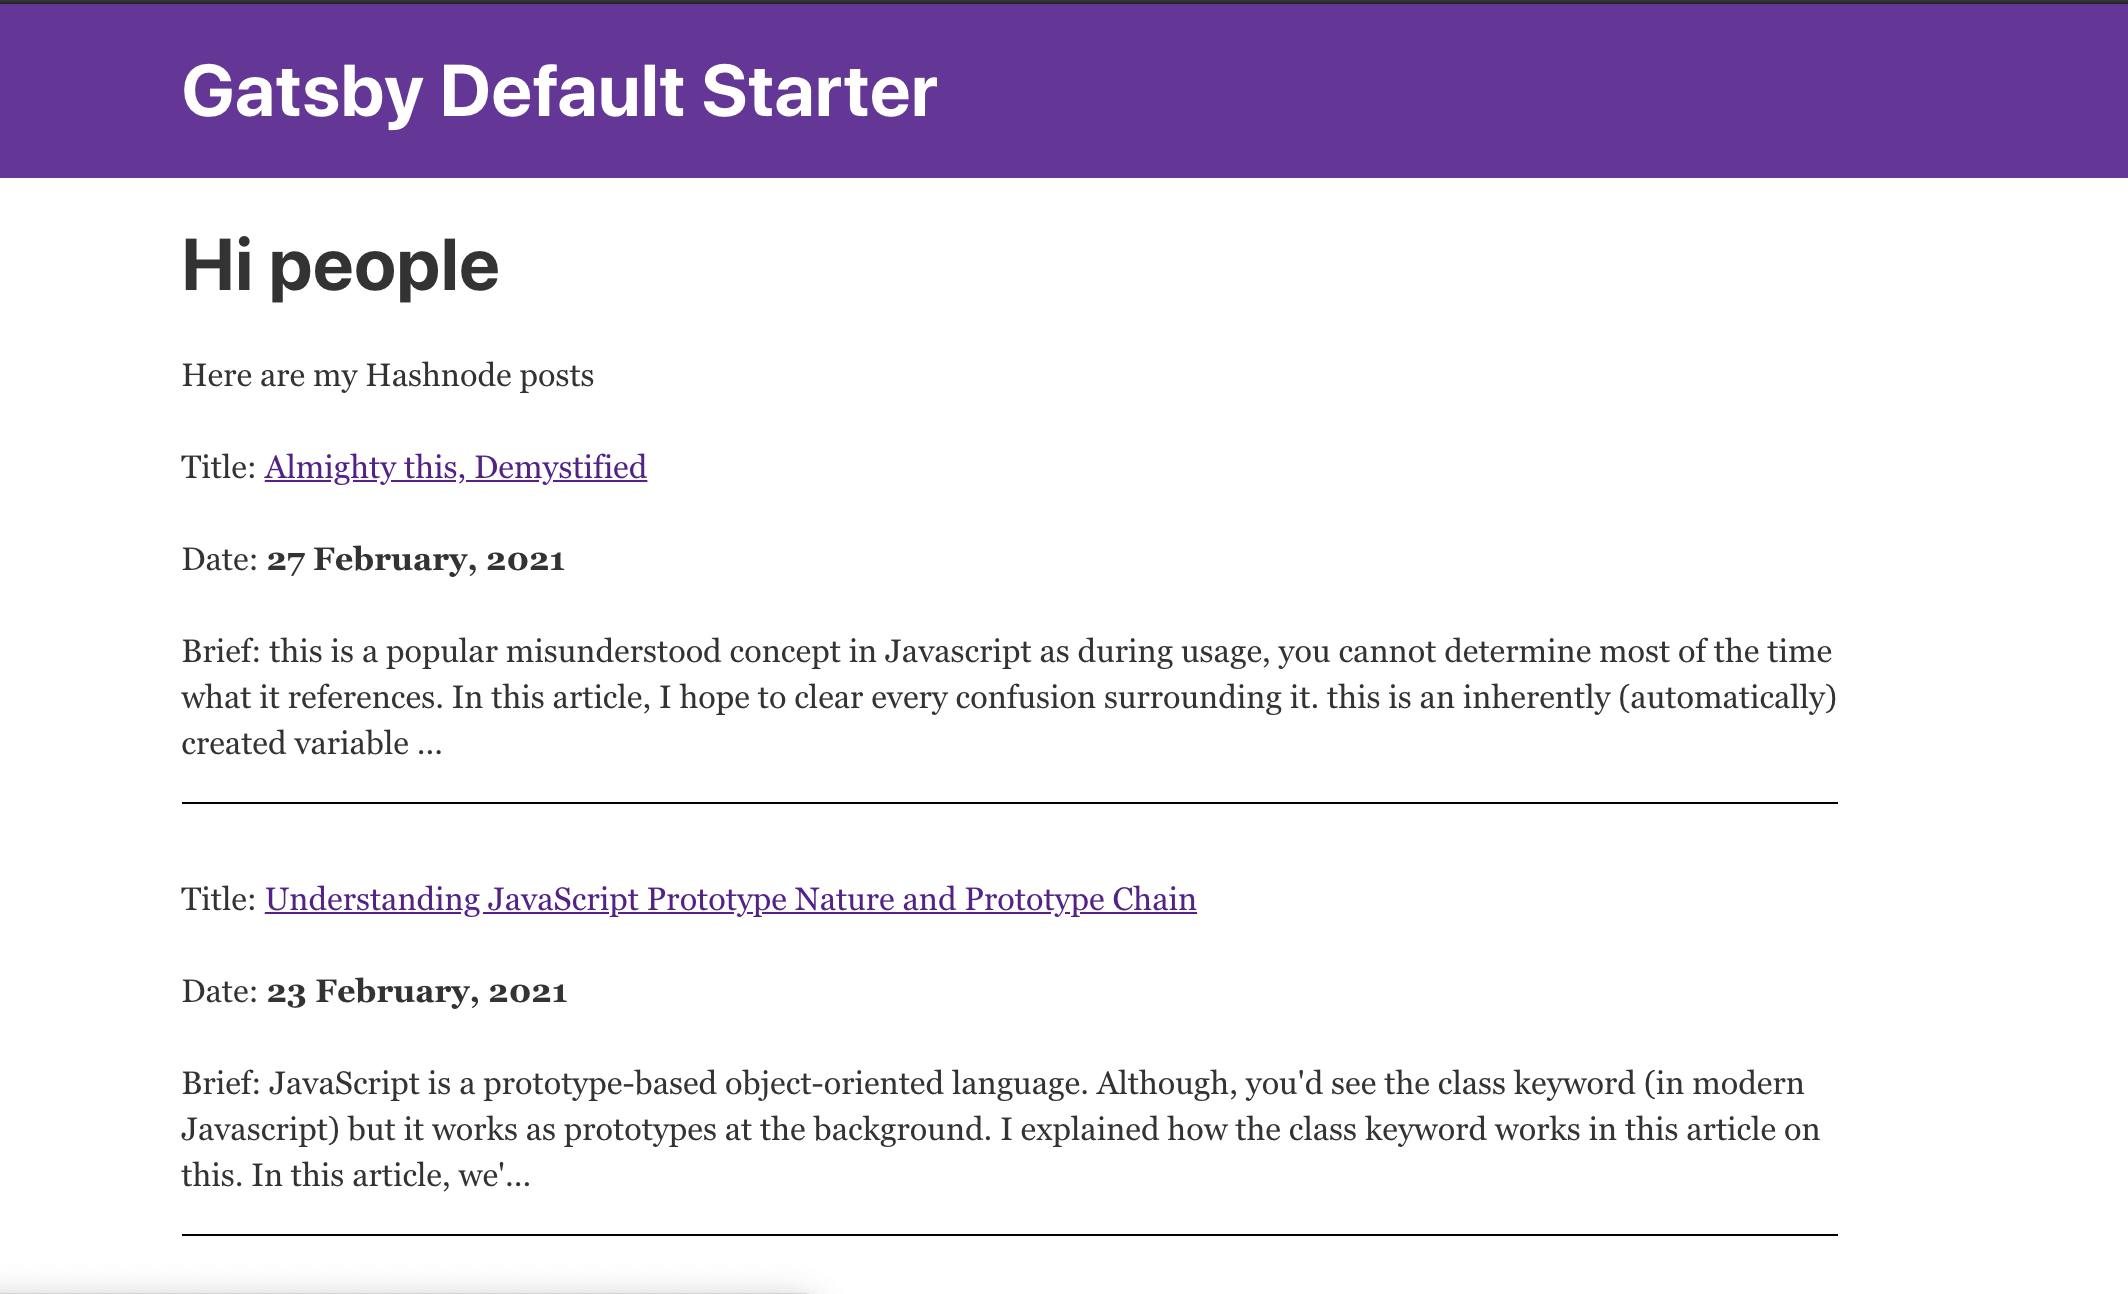
And we've come to the end of this tutorial.
Conclusion
In this article, we've learned how to build a source plugin for a user's Hashnode posts. You can also use this method to create a plugin that fetches a user's details from Hashnode and also many other things that the API allows you to fetch.
You may choose to put the results in a small section instead of making up the homepage.
You can publish what you create to NPM for others to use in any project. As it is now, it is only available to the project you're using it within.
With source plugins, you can fetch data from any source and create nodes that can be queried while you build your application.
During every build process, the plugin will fetch the latest posts and expose them to the homepage.